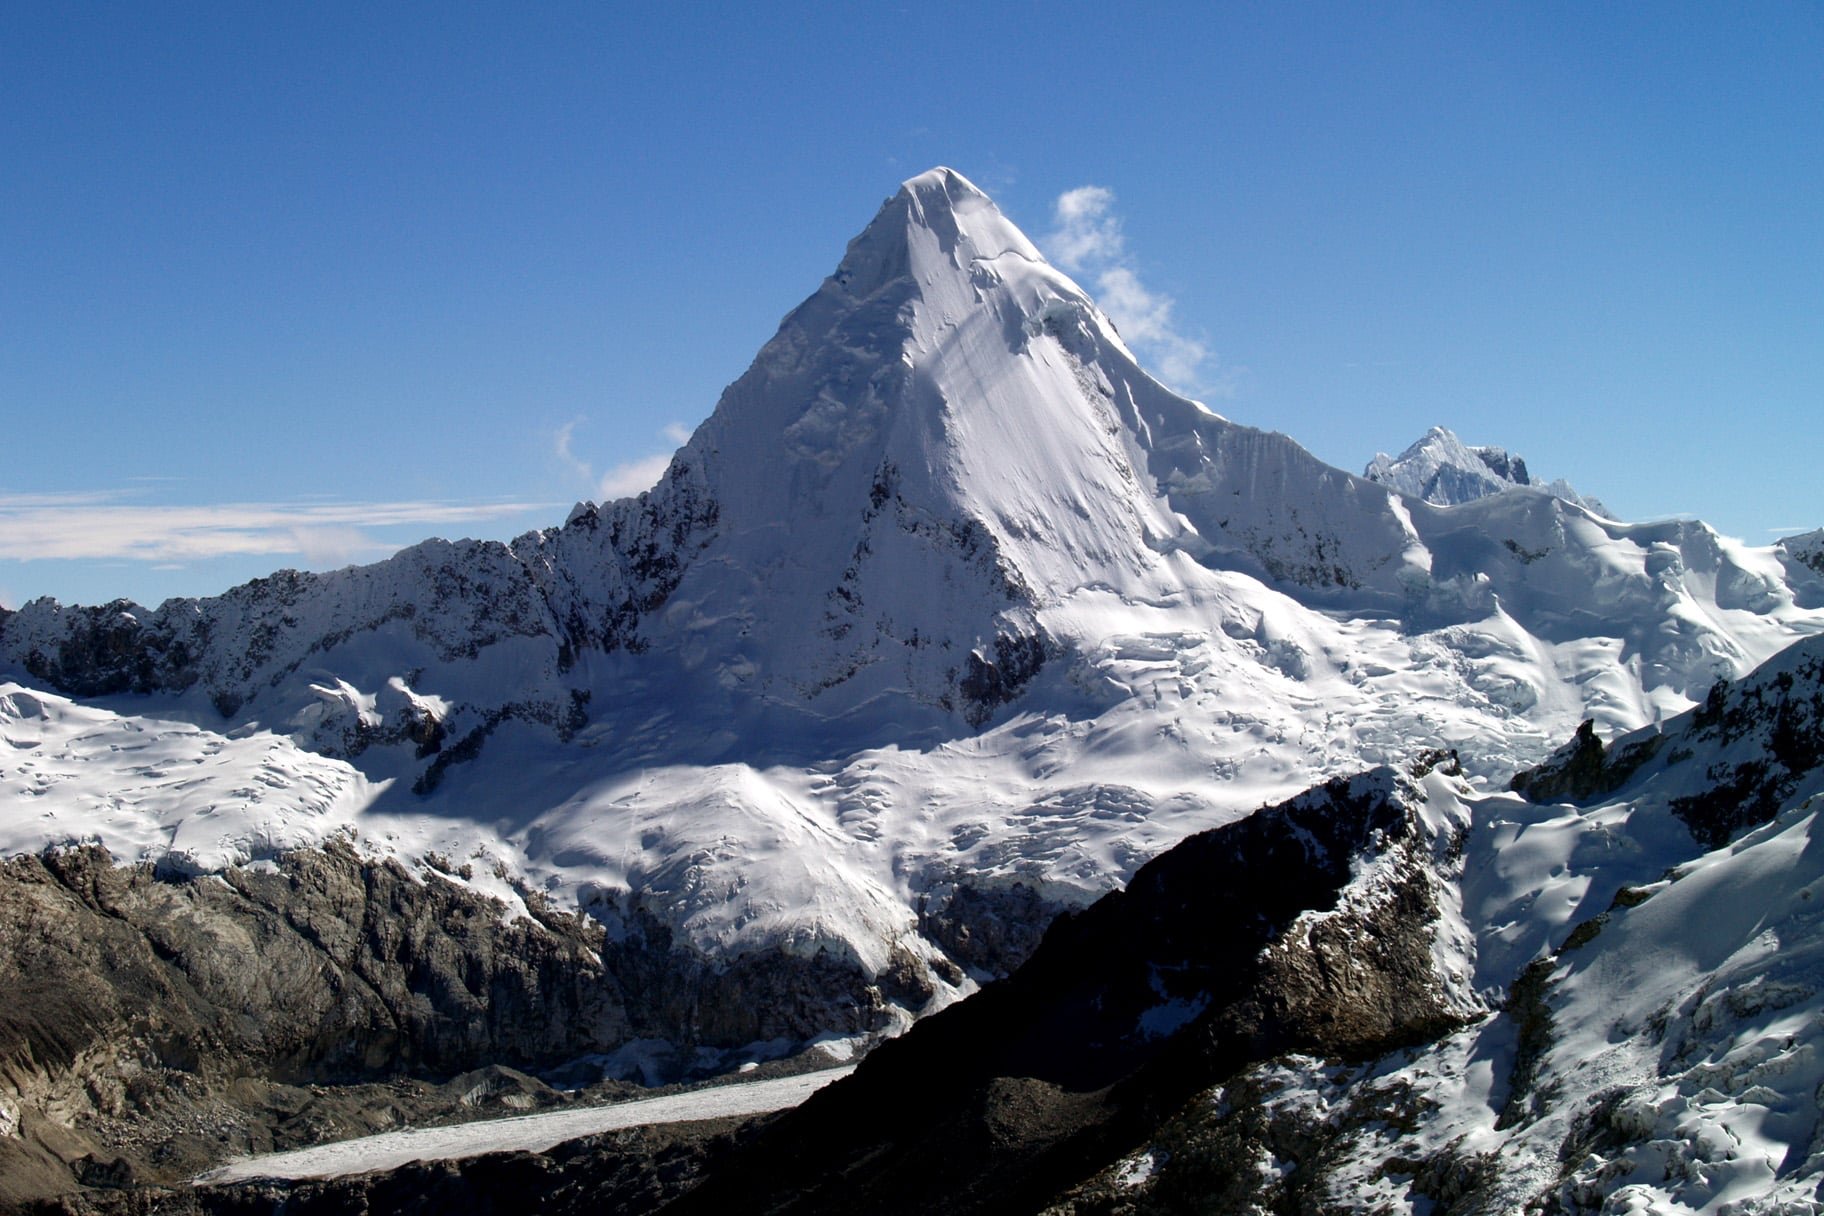
Artesonraju (6,025m / 19,767ft) via South Face
Solo on July 10, 2022.
Location: Parque Nacional Huascarán, Cordillera Blanca, Peru.
Ascent time: 4.8 hours, Descent time: 3 hours
This striking mountain rises between the Paron & Santa Cruz valleys and is an absolute classic of the range. It is famously known for being the basis of the “Paramount Pictures” logo, but to climbers it beckons because of its beautiful appearance and steep nature. Of all the mountains I saw in Peru during my time prior to this solo, this one stuck out to me and demanded attention. From the Paron Valley, the mountain offers a remote experience relative to many other sought after peaks of the park. The valley is guarded by Paron Lake and the mountain is hidden around the corner. Upon arriving to Moraine Camp, one looks out over an iceberg-filled lake, hanging ice shelves, a long glacier tongue, and a perfect summit. The camp is surrounded by many striking technical peaks in the likes of Pyramid Peak, Caraz 1, Chacaraju, and the Huandoys. In 2022, no one had yet climbed Artesonraju to summit via the Paron Valley. It was a climb I gravitated towards and was fortunate to find success through challenge & adversity on, in hindsight, what turned out to be the hardest night I’ve ever had in the mountains. Lonely, cold, at times frightened- I recall the ultimate chess match and the result was a stalemate: Artesonaju 1, Me 1. I summitted at 3:35AM in the pitch black and returned to camp shortly after sunrise humbled, tired, fulfilled. Artesonraju pushed me and I hiked out to the road with a new found respect for alpine climbing and for the blackness of a lightless night.
Nature of route: Moraine to Dry glacier tongue to snowy crevasse field, to steep sustained snow and Peruvian flutings.
Temperatures between 15F and 30F
Wind chill maybe 5F at coldest.
No light, the climb was done roundtrip in the dark.
Dry conditions
Relatively remote glaciated wilderness
Kit Synopsis
I didn’t vary much from my normal kit except for bringing less hardware, 4 snow pickets, and an extra headlamp. It was the right level of cold and consistent movement kept it at bay. In my backpack, two 60m ropes took up most of the space. Since no one had been up the route to the summit, I figured I’d freeze up a pair of gloves or two in the sun but they remained mostly dry throughout the climb and I stayed in my mid-weight glove throughout. I carried 1 liter of water containing two packets of ACLI-MATE.

My route up the South Face.

A poor summit picture! 3:35AM and pitch black.

Back in Camp as the sun came up. Photo by Antonio, my trusted friend & cook!
Clothing by Mountain Hardwear

Left to Right: Kor Air Shell Warm Jacket, Exposure/2 Shell, Phantom Parka.
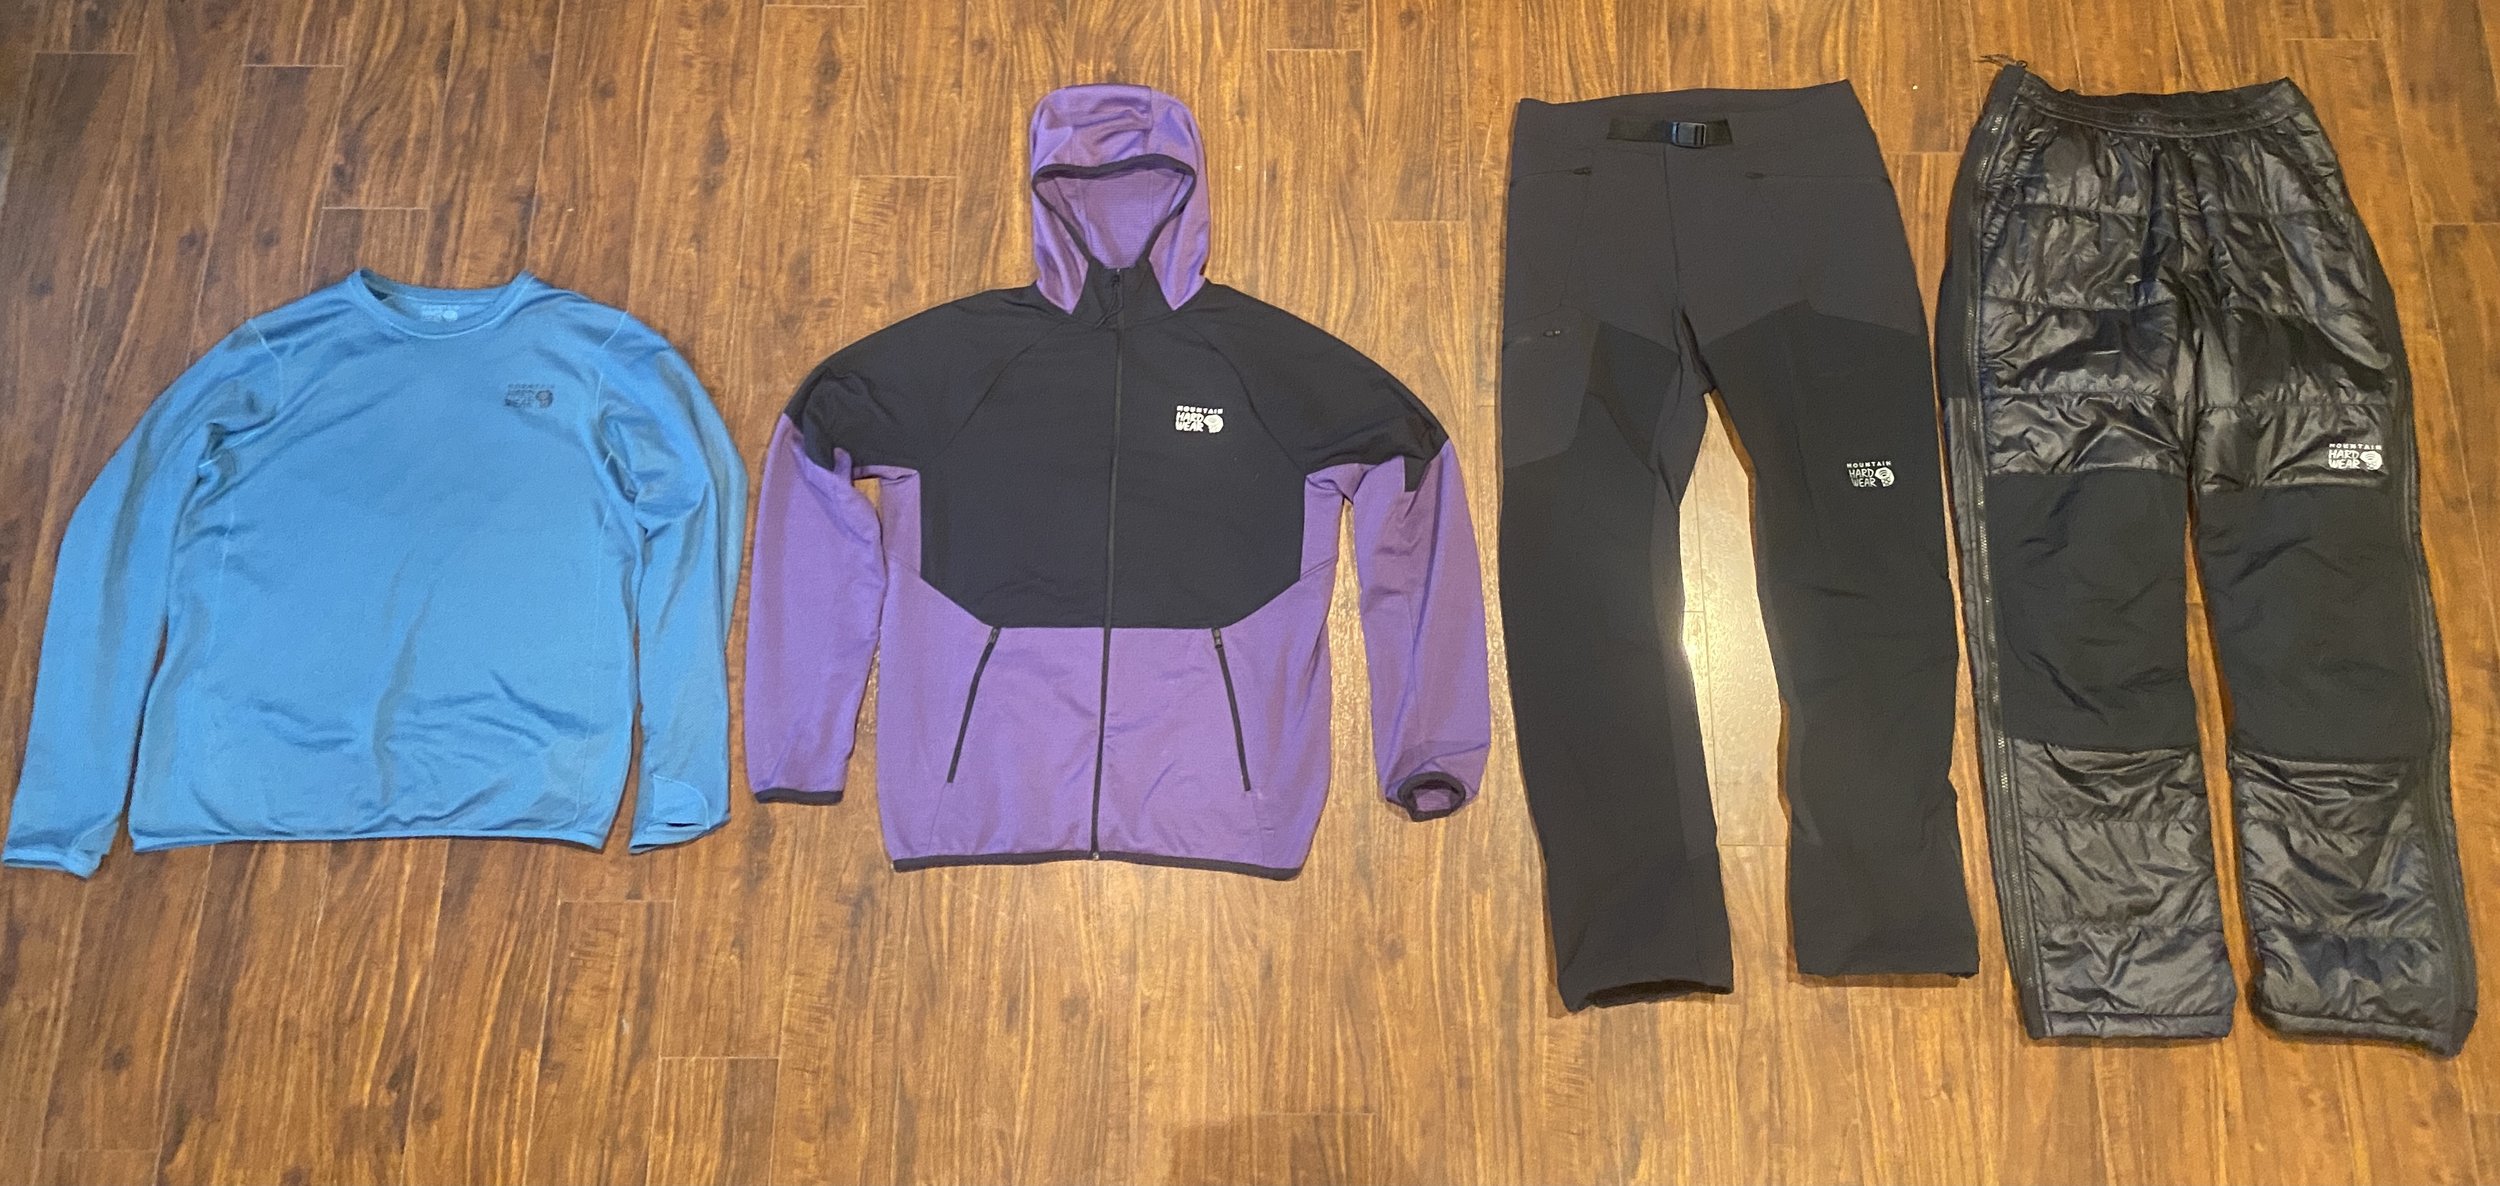
Left to Right: Air Mesh Long Sleeve, Stratus Range Fleece, Chockstone Alpine Pant, Compressor Pant.


Base Layer: Men's AirMesh™ Long Sleeve Crew
Light Puffy: Men's Kor AirShell™ Warm Jacket
Light Hardshell: Men’s Exposure/2 Gore-Tex Pro Jacket
Down Parka: Men’s Phantom Parka
Softshell Pant: Men's Chockstone™ Alpine Pant
Puffy Pant: Men’s Compressor Pant
Not pictured: Long Underwear, Wool Socks.
Clothing Overview: I used a near identical kit to my spring trips in Alaska. The combination of the Air Mesh long sleeve, Stratus Range Fleece, and Kor Airshell Warm Jacket has becoming a preferred setup for me. I like the softness and mobility. Without having a down layer, I have no worries about any abrasion damage that could occur during the trip. This is especially comforting on an international trip where repairs or replacements don’t come easy. These layers are all best-in-class in my opinion and together form the ideal layering system for alpine climbing. The Chockstone Alpine pant has become a reliable pick and its durability is on par with the happenings of a trip to the high mountains.
In brought the Phantom Parka for this trip because of its packability. It offers expedition-level warmth and packs small in a rucksack. It has a snag-free zipper which makes it come on and off quickly without worry of a tear. Stretchy cuffs slide easily over whatever layer arrangement is underneath and the hood tensions nicely over a helmet with the pull of a cord in the back. For puffy pants, it has hard to imagine a better synthetic build than the full-zip Compressor. Highly reliable, easily put on and off, and packs down in a rucksack. Worried about staying dry should the weather change, I brought a full Gore-Tex Pro jacket in the Exposure/2. This is a fully-loaded hardshell with a mobile fit and rugged zippers. It performs excellent moving from the mountains and can be trusted when conditions change. 10/10 pick.
Hands +Feet + Pack

Gloves: Exposure/2 top left, Geko Hot top right, Rotor bottom left, Geko Ice bottom right.
Primary Climbing Glove: CAMP Geko Hot Glove
Secondary Climbing Glove: CAMP Geko Ice Glove
Warmer Gloves if needed: Unisex Exposure/2 Gore-Tex Glove
Approach Glove: Unisex Rotor™ Gore-Tex Infinium™ Glove Unisex
Climbing Pack: Alpine Light™ 28 Backpack
Climbing Boot: La Sportiva G2 Evo
I brought four pairs of gloves on the trip. When it was time to climb, I left behind the Rotor gloves and went with the three warmer pairs since hands would be touching snow often. The CAMP Geko line is top tier and I used the Hot gloves throughout the climb. Comfort out of the box, full dexterity, and a cozy core make them a great choice for alpine climbing. For my warmest glove, I kept the Exposure/2 tucked away in the pack should I need them. The Alpine Light 28 pack is spot on with an ideal build for a day out alone on a big peak. It has a lightweight construction, which is relatively bare bones in features, paired with the convenance of a removable pocket, and features for holding tools, crampons, and snow pickets. For reference I fit in it: Two 60m ropes, Parka + Puffy Pants, 2 pairs of gloves, 1L insulated Nalgene, Accessory kit bag (Snacks + Supplies) and at times a hardshell jacket. On the outside, snow pickets carried well in a stack on the ice tool holder. For footwear, a double boot build seemed mandatory. And good thing because my right leg fell into a glacier pool before midnight on the way up!
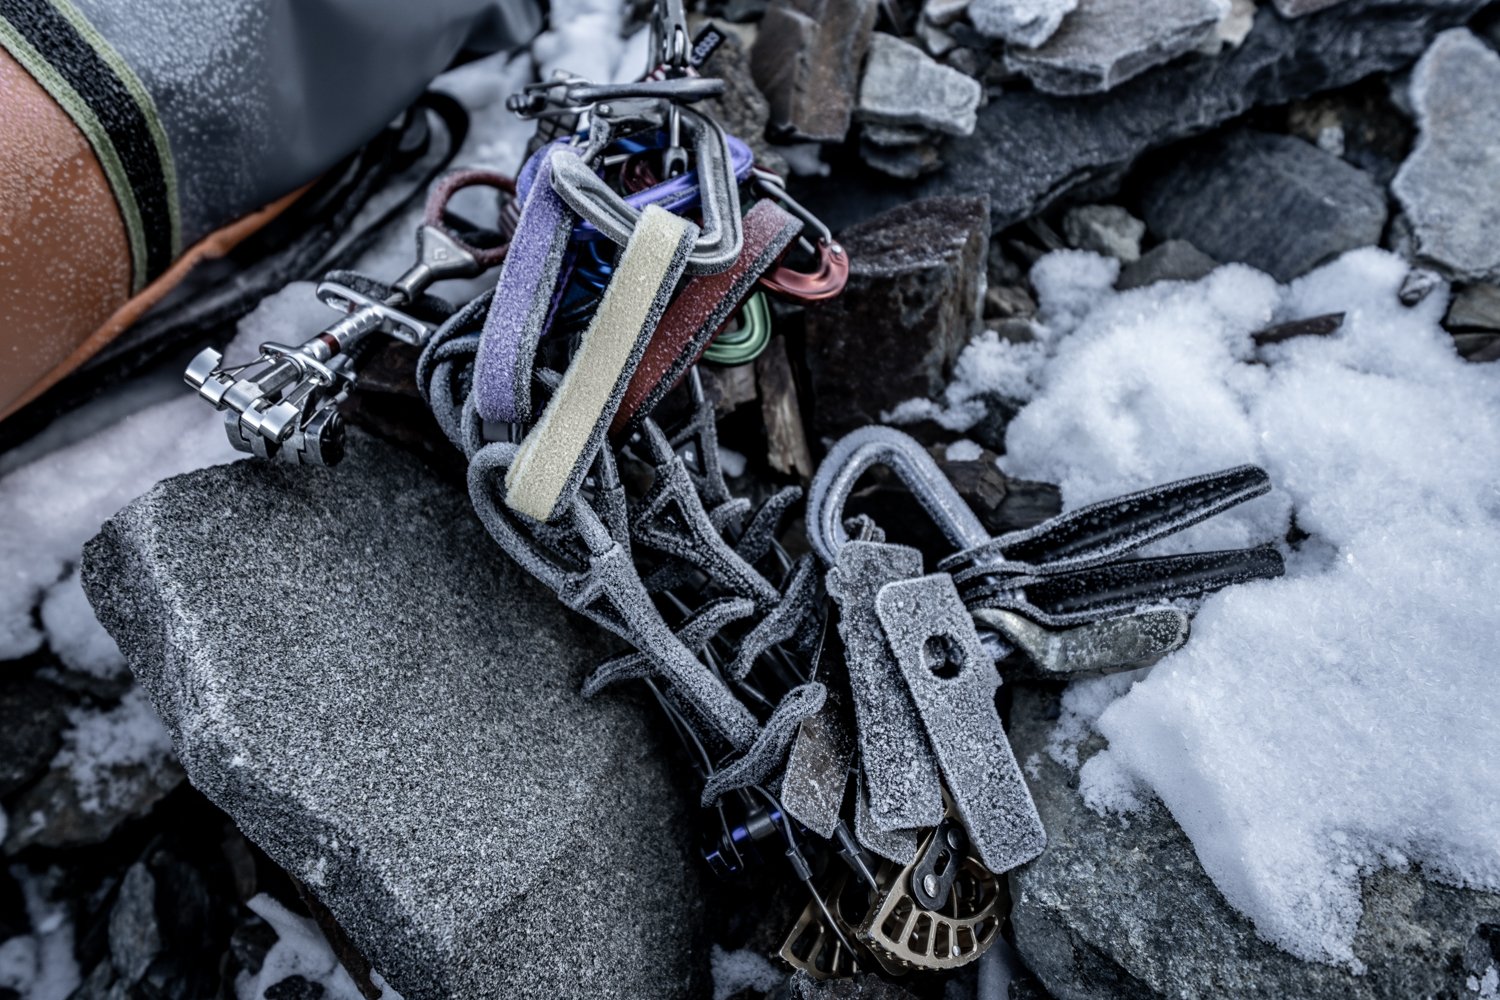
Route Hardware by CAMP
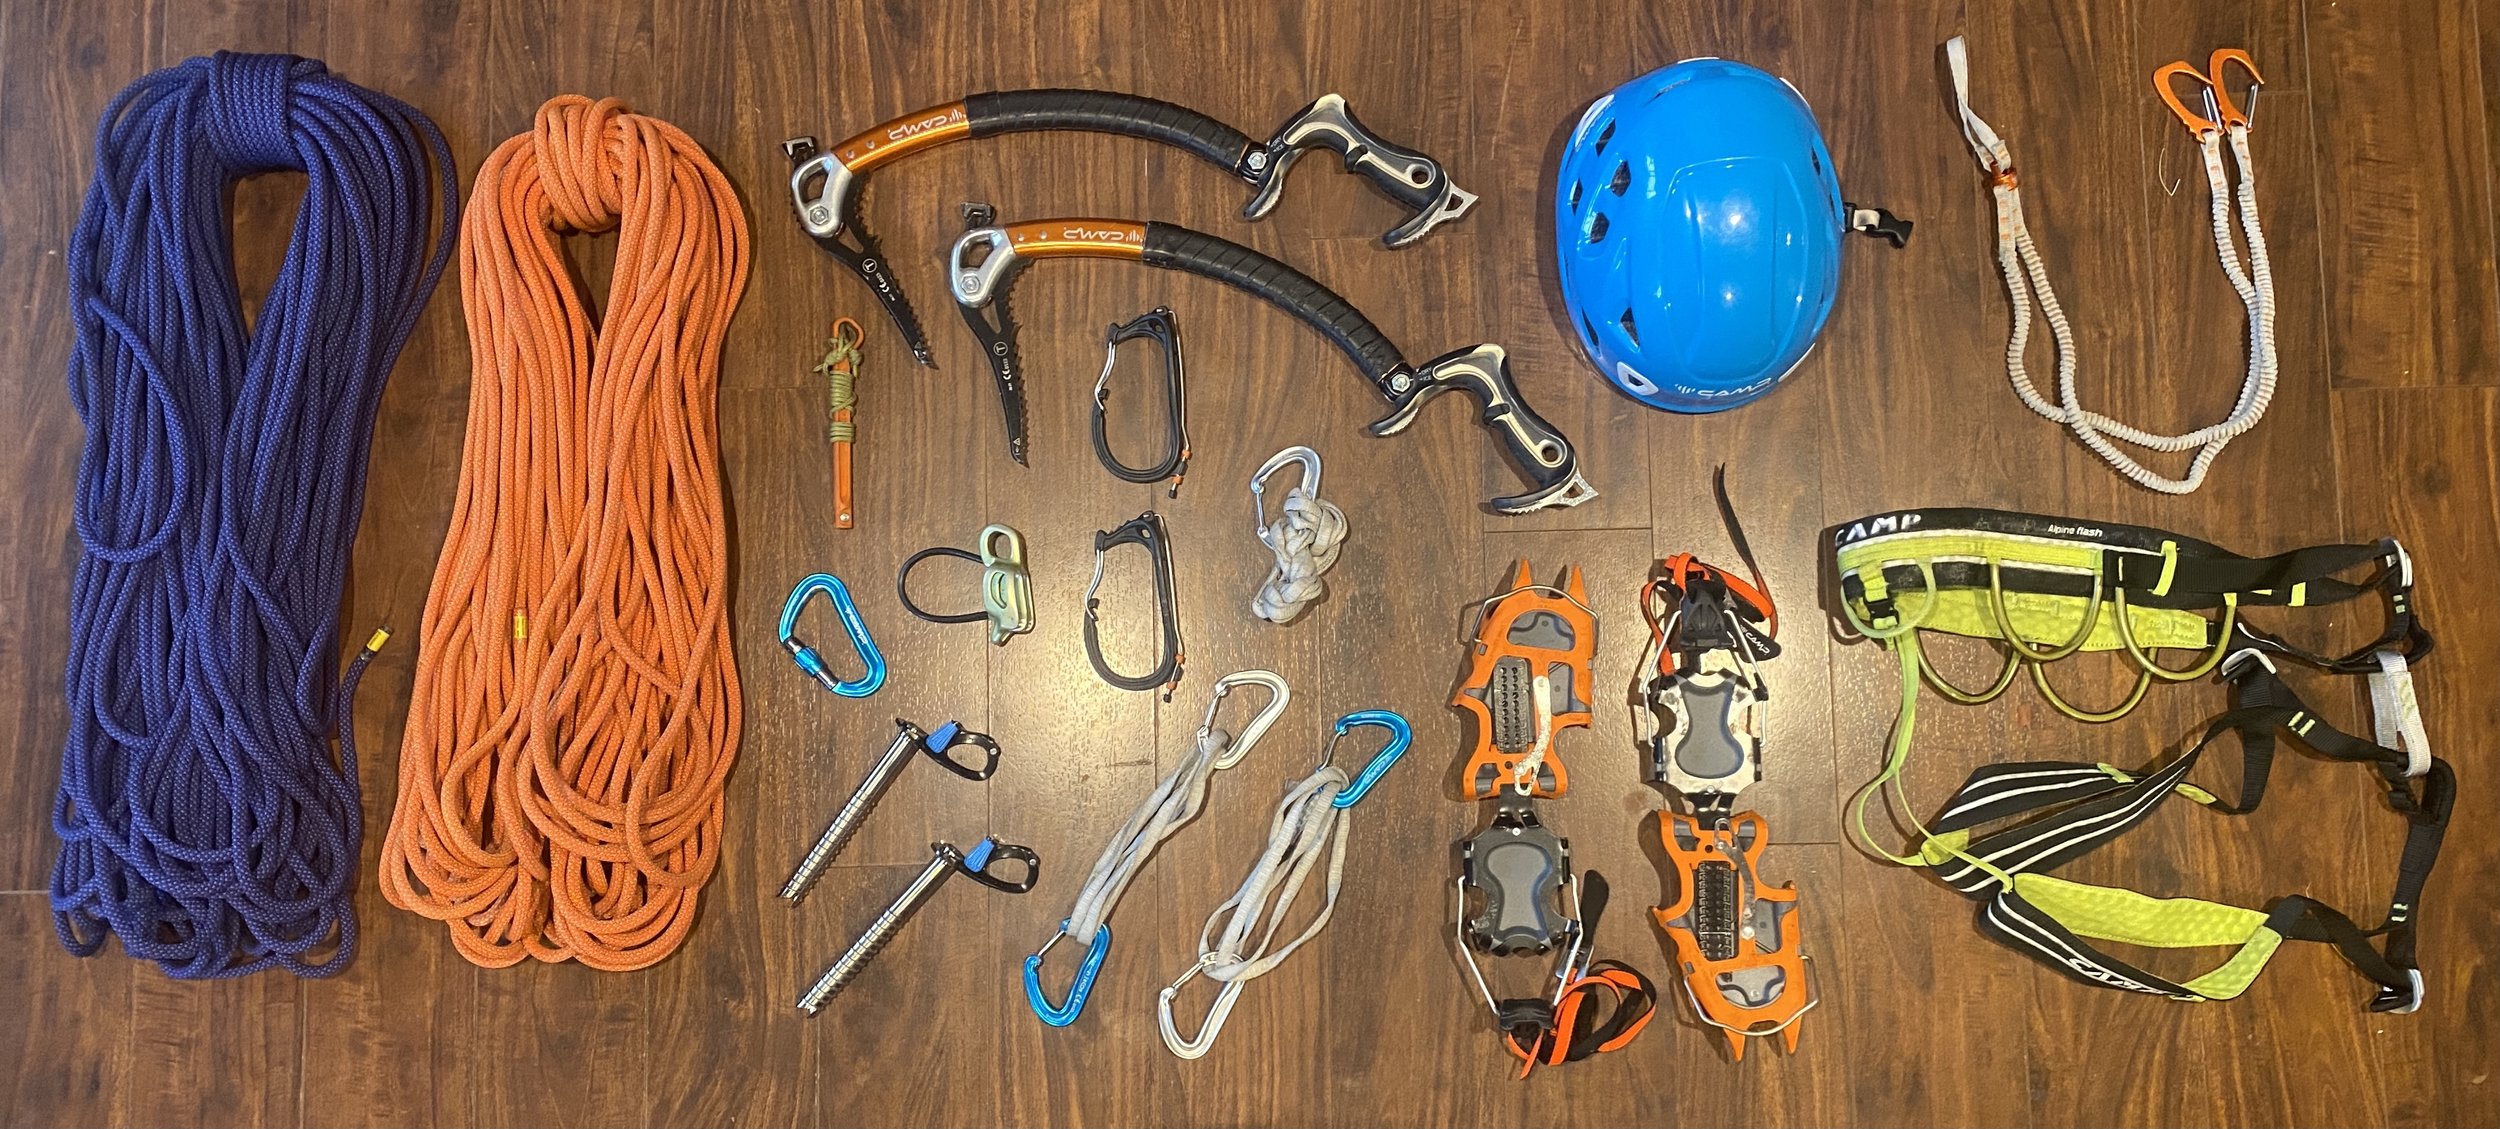
Ropes: Two 60m Twin 7.4mm Photons
Crampons: CAMP Alpinist Pro
Ice Tools: CAMP X Dream Alpine
Helmet: CAMP Storm
Harness: CAMP Alpine Flash
Belay Device: Black Diamond Alpine Guide ATC
Locking Carabiner: CAMP Photon Lock
Two Alpine Draws: CAMP Nano 22 Carabiners, 60cm Dyneema Sling
Two Ice Screws: CAMP Rocket 16cm
Extras: Nano 22 w/ 120cm Dyneema Sling, V-Threader, Ice Clippers
15 feet of cord
The route seemed quite straight forward in terms of technical terrain that demands equipment. There was no mixed terrain or really any ice climbing. Snow was the theme of the night and the route could be climbed with a less technical set of ice tools but the X Dream is my tool of choice anyway so I was happy to have them! I had anticipated climbing steeper alpine ice to the summit the last 100m as others have found in the past, but the summit meters were a mushroom hanging over the face so I was on snow as I worked under it and eventually around rather than climbing on it. I bought four two-foot pickets and used them for rappelling just the first few hundred meters off of the summit, other than that it was a down climb on steep snow until the bergschrund. The Alpinist Pro crampon was excellent and I enjoyed good footwork in them all night. They are built quite strong and seem unlikely to have any sort of product-failure issue occur. I didn’t need much else but an ATC and the ropes.
Accessory Kit

Garmin 66i inReach
Petzl Swift RL Headlamp
Petzl Bindi Headlamp
1 Liter Nalgene w/ insulated sleeve + Acli-Mate energy drink mix.
(2) Pro Bar dummies
(2) Clif Energy Bloks
Chocolate
Garmin Instinct Solar Watch
Dermatone SPF 30 Sunscreen Stick
Small Med Kit
Extras: Front bar replacement for Alpinist Pro Crampons, Allen Wrench for X Dreams, Chapstick.
I went light on food and water and favored movement over snack breaks. I was pretty tired when I returned to camp but I was happy to have done the climb in good time. I left camp for the route well before midnight so having two headlamps seemed generally like a good idea. It sure was as one of my headlamps died shortly after beginning the descent. Instead of bringing an extra battery for the Swift RL, I went with a lightweight lamp in the Bindi. I didn’t actually bring that hat but its a nice souvenir anyway!
Travel, Trek, & Camp.
Trek Kit:
Base Layer: Men's AirMesh™ Long Sleeve Crew
Shorts: Men’s Shade Lite Short
Trekking Poles: CAMP Sky Carbon Evo
Cap: Wander Pass Hat
Travel Kit:
Bottom: Men's Basin Pull-On Pant
Pack: Redeye 45 Travel Pack
Duffels: Expedition 100, Camp 4 135L
Camp Kit:
Sleeping Bags: Phantom 0F Gore-Tex, Phantom Alpine 15F
Tent: Trango 3


See Also: The Darkest Night Alone on Artesonraju on the Stories Page.